
How to use the Grid Locator
-
Enter nearest town or address:

The search bar at the top of the Grid Locator will make the map display the nearest location it can find for the address, city, longitude and latitude coordinate, or zip code entered.
For more information about how to enter a location, check the "More Info" link below the search bar. -
Click Search:
After clicking the search button, the map will zoom into the location it found and place a pin at this location.
-
Navigate to property:
To change the location, drag the map or use the direction buttons on the control located at the top left of the map.
-
Click a point on property:
Clicking on the map will set a pin at that location. The Grid ID and other information about that location will be shown in the panel on the left.
Multiple locations can be selected by clicking the icon at the top left of the map.
Regions can be selected by clicking the icon at the top left of the map.
-
Print view for records:
Click the "Print" link located at the top right of the map. This will open a new print window where the location can be refined.
-
Note the Grid ID:
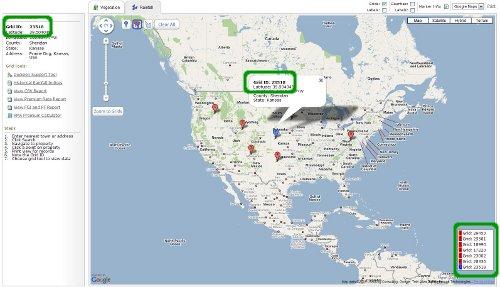
The Grid ID of the selected pin is located on the left panel.
The Grid ID of other pins (in multi-pin mode) can be found in the panel on the right side of the map, or by clicking that pin. -
Choose grid tool to view data:
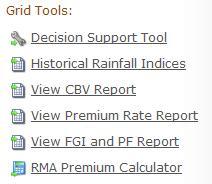
The links on the left panel, below the information for the selected pin, open tools to view data for the current location.
Internet Browser
The Grid Locator is tested on Internet Explorer 7, Firefox 3.5, and Safari 4. Please make sure your browser version is up to date.
Contact Information
To report issues with the Grid Locator, contact RMA at:
For more information regarding these programs, please contact a qualified crop insurance agent.